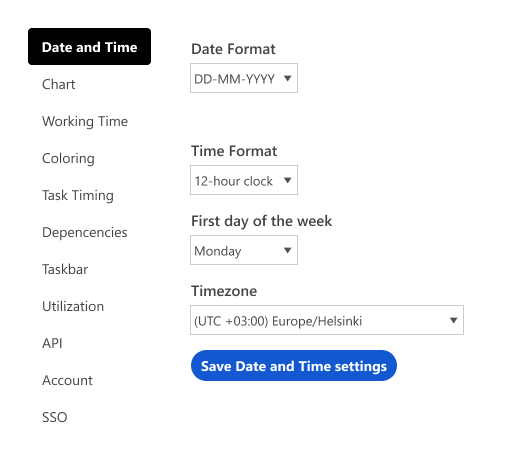
This is where you can configure your planner’s Date and Time Settings. Customize the date format, time format, the first day of the week, and time zone.
Must Know
- Account level Date and Time Settings are only available to Owners and Admins.
- Once chosen, these settings will be applied across the whole planner and to all users. All scheduled tasks will be displayed in the selected time zone.
- Individual Users are still able to apply a personal time zone via Personal Settings and view the scheduled data in their time.
Set Date and Time
Start from General Settings > Date and Time. Find Ganttic's General Settings at the bottom of the left Sidebar with this icon.
![]()
- From the first dropdown menu, select Date Format. Choosing how you’d like the date shown.
- In the second menu, Time Format, choose between a 12 hour clock or 24 hour clock.
- Now choose which day your work week starts in the menu for the First day of the week.
This can be Sunday, Monday or any other day of the week. On the Gantt chart, this day will be displayed as the first day of the week. - Finally you can configure your Time Zone settings.
NB! This can be overwritten for users in the Personal Settings, so that all planned data is displayed in their selected time zone. - Hit Save Date and Time Settings to complete.

Next Steps
Continue setting up your planner by proceeding to Chart Settings. Or configure your working hours and holidays in Work Time Settings.